Market Order
Buy or sell instantly at the current market price. The Router automatically finds the best execution path between the CLOB (limit order book) and the AMM (Uniswap v4 pool) via CLOB & AMM Hybrid mechanism.
When to use
Section titled “When to use”- ✅ Enter a position immediately, accepting the prevailing market price
- ✅ Small trades (< 1% of liquidity) where slippage is acceptable
- ✅ You have no strong view on a better price ahead
- ❌ Avoid for large size in thin markets - use a limit order instead
Buy / Sell Semantics
Section titled “Buy / Sell Semantics”| Action | What you specify | What you receive |
|---|---|---|
| Buy YES / NO | USDC amount to spend (e.g. 100 USDC) |
Variable number of YES / NO shares |
| Sell YES / NO | Number of shares to sell (e.g. 200 YES) |
Variable USDC amount |
How to Buy YES
Section titled “How to Buy YES”-
Step 1: Access the Trading Panel
- Navigate to the Market Detail Page of your chosen event.
- On the right-hand panel, ensure the Buy tab is selected.
-
Step 2: Select Your Side & Amount
- Choose the YES side (indicating you believe the event will happen).
- Enter the USDC amount you wish to spend (e.g., $$ $100$ $$).
-
Step 3: Adjust Slippage Tolerance
- Set your preferred slippage tolerance.
-
Step 4: Preview your Trade
Before clicking buy, verify the following details:
- Estimated YES received: The total tokens you will get.
- Average price: The projected cost per token.
- Actual slippage: The expected price impact based on current liquidity.
- CLOB / AMM split ratio: How your trade is distributed across the Order Book and Liquidity Pool.
-
Step 5: Execute and Confirm
- Click the Buy button.
- Confirm the request in your wallet:
- Passkey Wallet: Use Touch ID / Face ID.
- EOA Wallet: Approve the MetaMask (or other wallet) popup.
-
Step 6: Success
- Wait approximately 2 seconds for the transaction to process.
- Once confirmed, you can view the trade in your Portfolio under the History tab.
How to Sell YES
Section titled “How to Sell YES”Same flow but under the Sell tab:
-
Step 1: Switch to the Sell Tab
- Navigate to the trading panel on the market detail page.
- Select the Sell tab.
-
Step 2: Configure Your Sale
- Ensure YES is selected.
- Enter the amount of tokens you wish to sell.
-
Step 3: Review and Confirm
- Preview: Check the estimated USDC you will receive after fees and slippage.
- Confirm: Click the Sell button and approve the transaction in your wallet.
How to Buy / Sell NO
Section titled “How to Buy / Sell NO”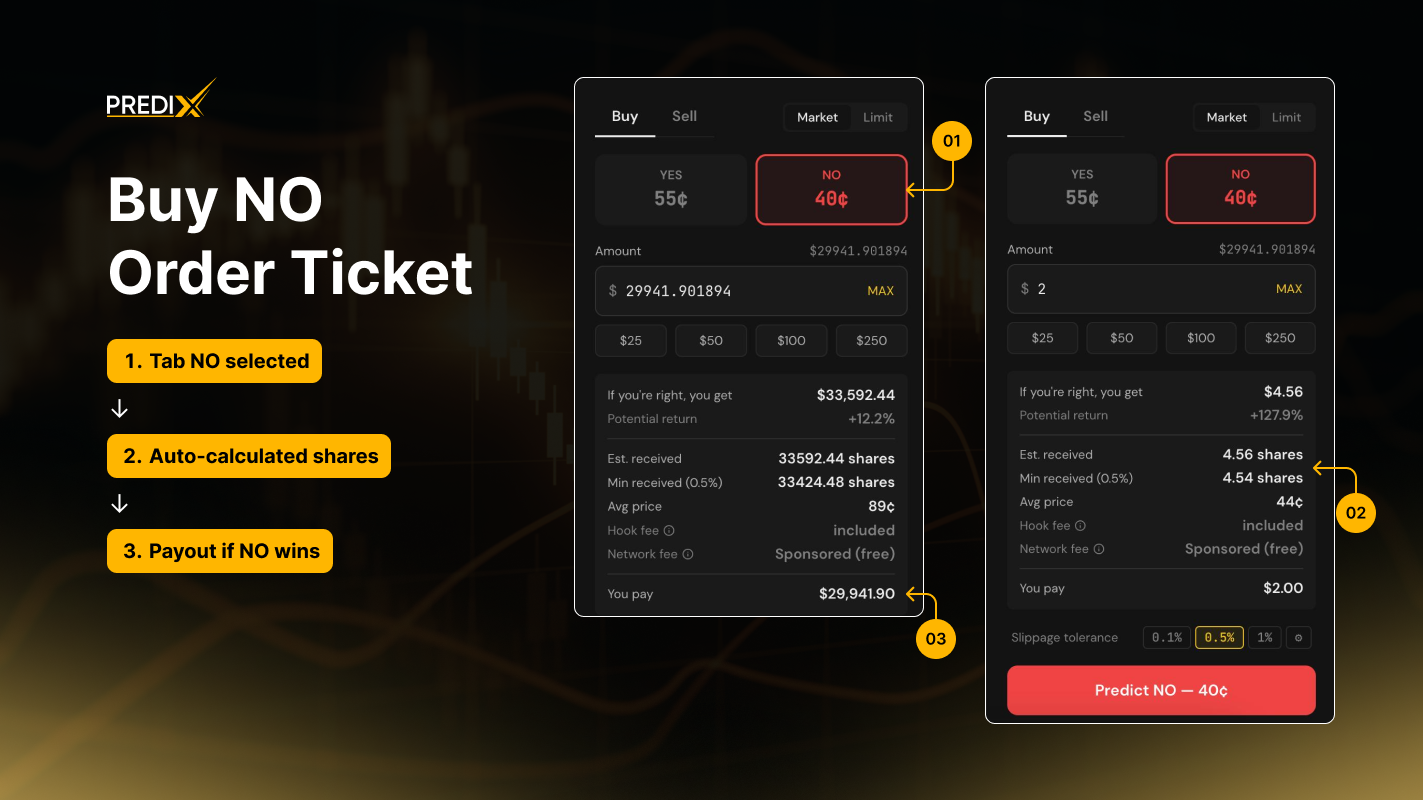
Buying or selling NO works the same way as YES. The Router automatically searches for the best available execution path between the on-chain order book (CLOB) and Uniswap v4 liquidity pools.
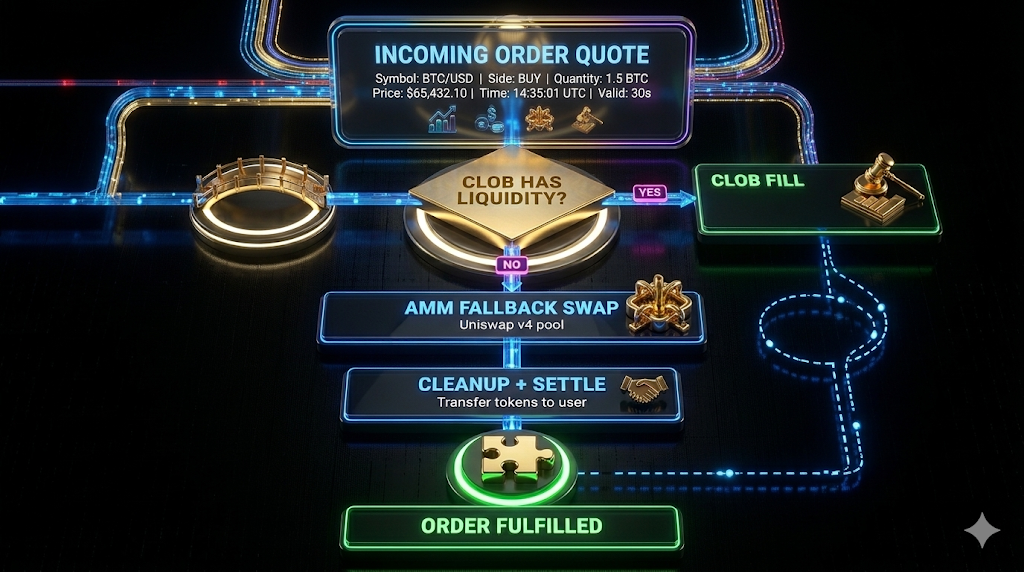
Automatic Router Mechanism
If direct NO liquidity is insufficient, the Router may use an internal “virtual-NO” routing flow to complete the trade through the YES side and settle the final output automatically. This process happens entirely in the background - the UI simply displays the final execution price and amount.
Users do not need to manage routing logic manually. PrediX handles liquidity aggregation, fallback execution, and settlement within a single transaction.
Split / merge shortcut
Section titled “Split / merge shortcut”In the same panel, under the Split / Merge tabs:
- Split: 100 USDC → 100 YES + 100 NO. Useful when you want to hold both sides and sell them separately (market making).
- Merge: 100 YES + 100 NO → 100 USDC. Useful when you hold both sides and want to withdraw.
No protocol fee. Gas is paid by the user by default; sponsor coverage applies if the user qualifies for the program (applies to both account types).